The newest firmware for ATARI, Apple2, CoCo, and Coleco Adam devices, FujiNet Firmware 1.5, has been released! Below you’ll see a distilled set of changes that have gone into this firmware release, which supersedes the 1.4 release that happened last year in August.
A huge thank you to everyone who helped get this release cut!
FujiNet Firmware Release v1.5.0
All Platforms
Recursive TNFS Filtering added
Memory optimizations and performance enhancements
Added support for new QR code generator functions
Atari 8-Bit
Correctly set CLK_IN GPIO to avoid interfering with other SIO devices when not used
Integrated new Altirra 850 handler and relocator — fixes crash when pressing the Break key
Heap free reporting added to FujiNet button B
Improved SIO network protocol parsing
sio_random_number() API added
Added QR Code generator support to Fuji Device
Config-NG (Next Generation) option added to WebUI
Apple II
Added QR Code generator support to Fuji Device
Improved Disk II handling:
Disk II WRITE support added
Disk creation UI enhancement: added DOS 3.3 to “New Disk” menu
Config now shows SLOT and DRIVE number for Disk II mounts
Added SmartPort command to retrieve FujiNet heap size
Tandy Color Computer (CoCo)
Improved network device open behavior using deviceSpec
set_prefix support merged from SIO
Coleco ADAM
Aligned with general v1.5.0 core improvements and stability updates
Commodore IEC
Improved protocol reliability and saveFile functionality
Jeff Piepmeier and Ben Krein will be at VCF East Apr. 4-6 showing off #FujiNet and its progress, this year. Including the #RS232 version, the #Atari2600 version (based on PlusCart) and more! #retrocomputing #retrogaming
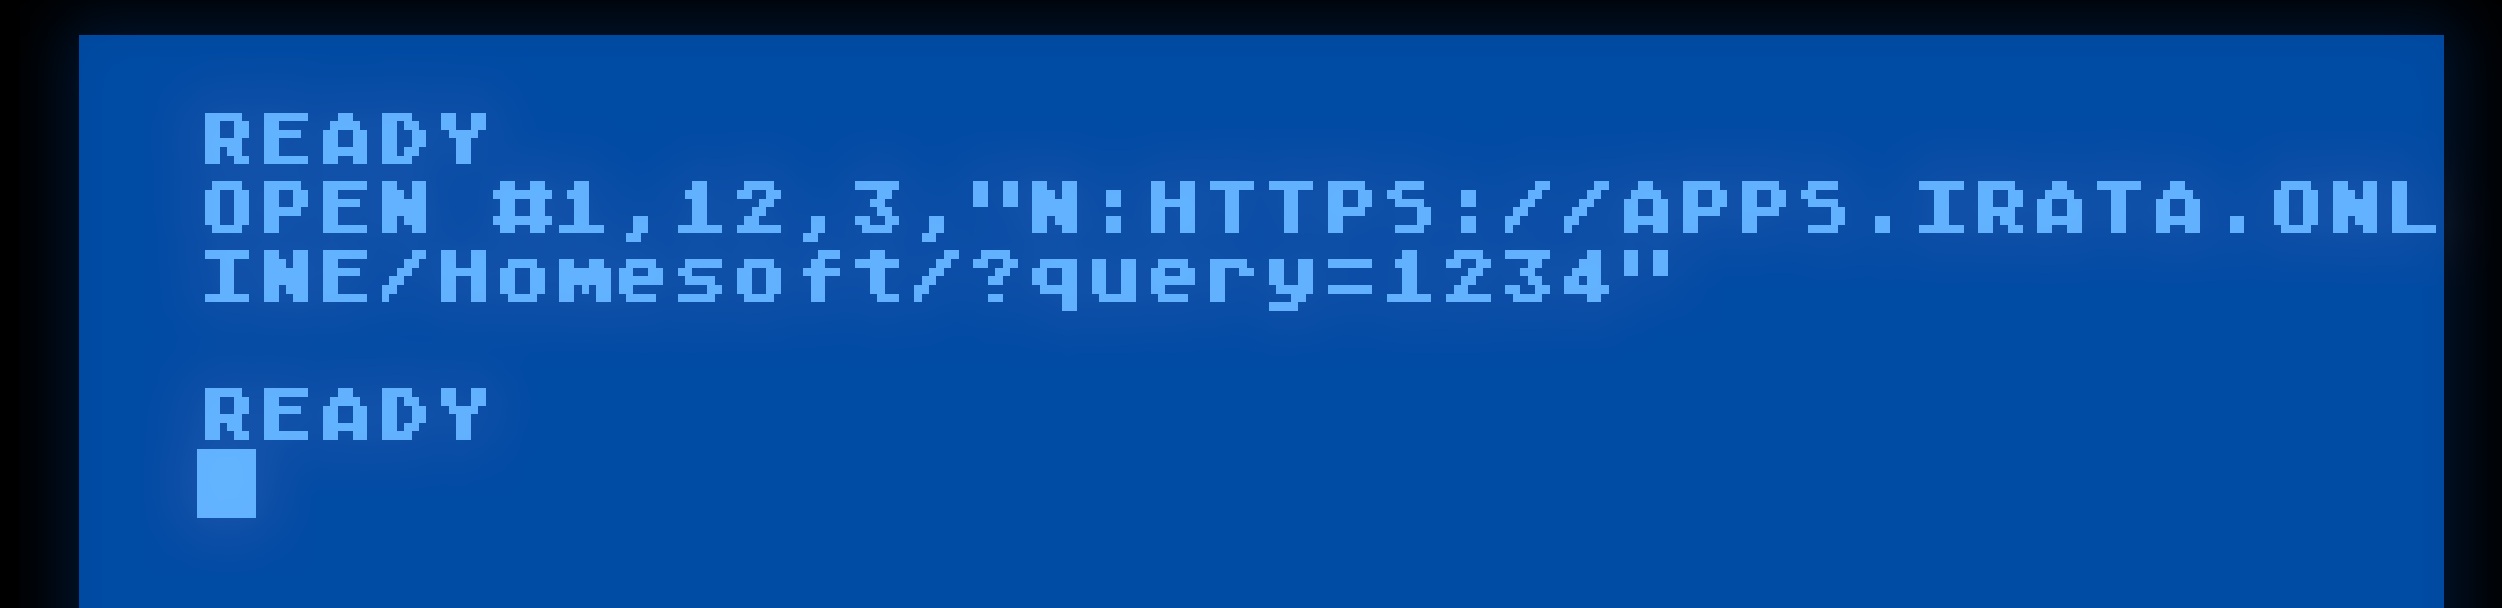
TL:DR – When opening an HTTP GET connection, use mode = 12. Mode = 4 now does URL encoding of the path when it’s passed in, and will probably not be what you want.
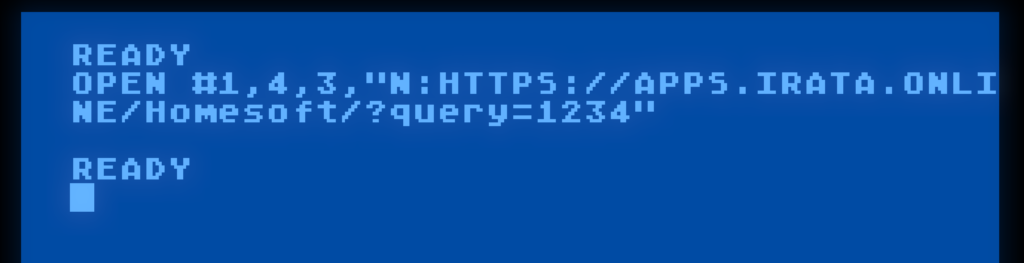
While Mode = 4 is also an HTTP GET, it will attempt to resolve filenames and encode them so that they can be safely passed to and from a web server. It is intended for accessing plain files on HTTP and WebDAV servers.
So if you’re doing this in ATARI BASIC:
Change it to this:
For cross-platform C programs written in fujinet-lib, use the HTTP_GET_H constant in nopen():
Web servers, and in fact the standard that dictates the format of a URL give special meaning to characters like ? and &, as well as disallowing spaces. If these characters are to be used as part of a file name, they must be encoded so that the web server can pass them through literally.
On the ATARI, at least. You have the N: device. It can open any type of network connection, including to a networked filesystem. This can be used to access files stored on web servers. The encoding of filenames can break the seamless transparency expected, so some additional processing now happens in the FujiNet firmware to encode filenames so that web servers will treat them literally.
For example, with the latest change, this command works as expected:
It does, however, make a bit of a mess when dealing with query parameters, as characters like ? get encoded, and the web server treats them literally as part of the path, rather than as the special query character:
This is why if you’re utilizing some web address that does an HTTP GET, and accepts query parameters, to please use mode 12, which does not do any transformation of the input, and passes it to the web server, unmolested.
FujiNet exposes several devices to your ATARI computer. One of them is the network device, which can access local or Internet network resources. While we provide a handler that adds an N: device, certain programs (such as the DUP.SYS in ATARI DOS 2.0) write over the handler when they load into memory, making the N: device unusable within DUP.
To work around this, a series of tools exist which access the FujiNet network device directly via SIO, thus do not require the presence of the N: handler (also called NDEV.COM).
Each tool has been tested in every possible DOS, and have been made to adapt accordingly. Since SpartaDOS, OS/A+ / DOS XL, and XDOS all support command line parameters, the tools automatically fetch parameters if they are present. The tools fall back to interactive mode if no parameters are given on the command line.
Each tool (with the exception of NCOPY) has been written to assume that no use of N: means to refer to N1:. There are 8 such N[x]: devices, numbered N1: to N8:. Both the N: handler (NDEV.COM) and the N tools refer to the network devices in this same way.
Furthermore, the companion disk, fnc-tools-doc.atr contains documentation for each tool mentioned below.
The Tools
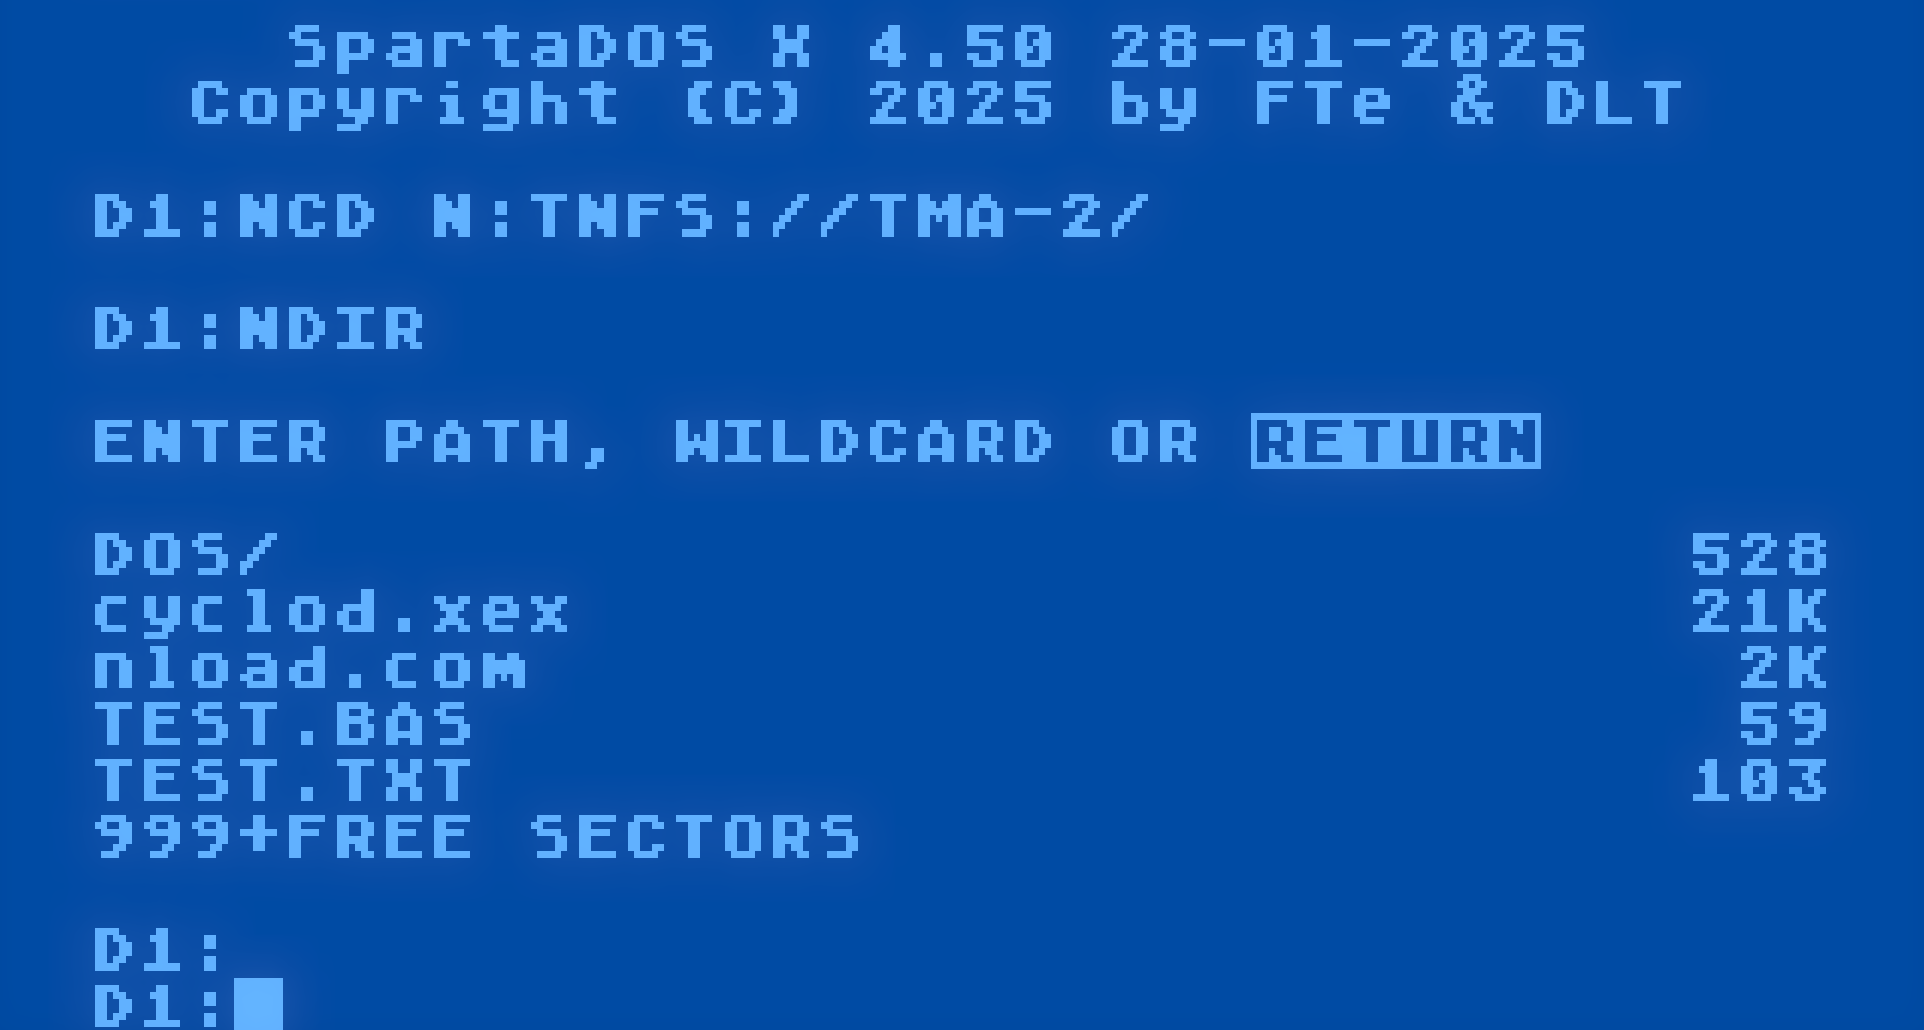
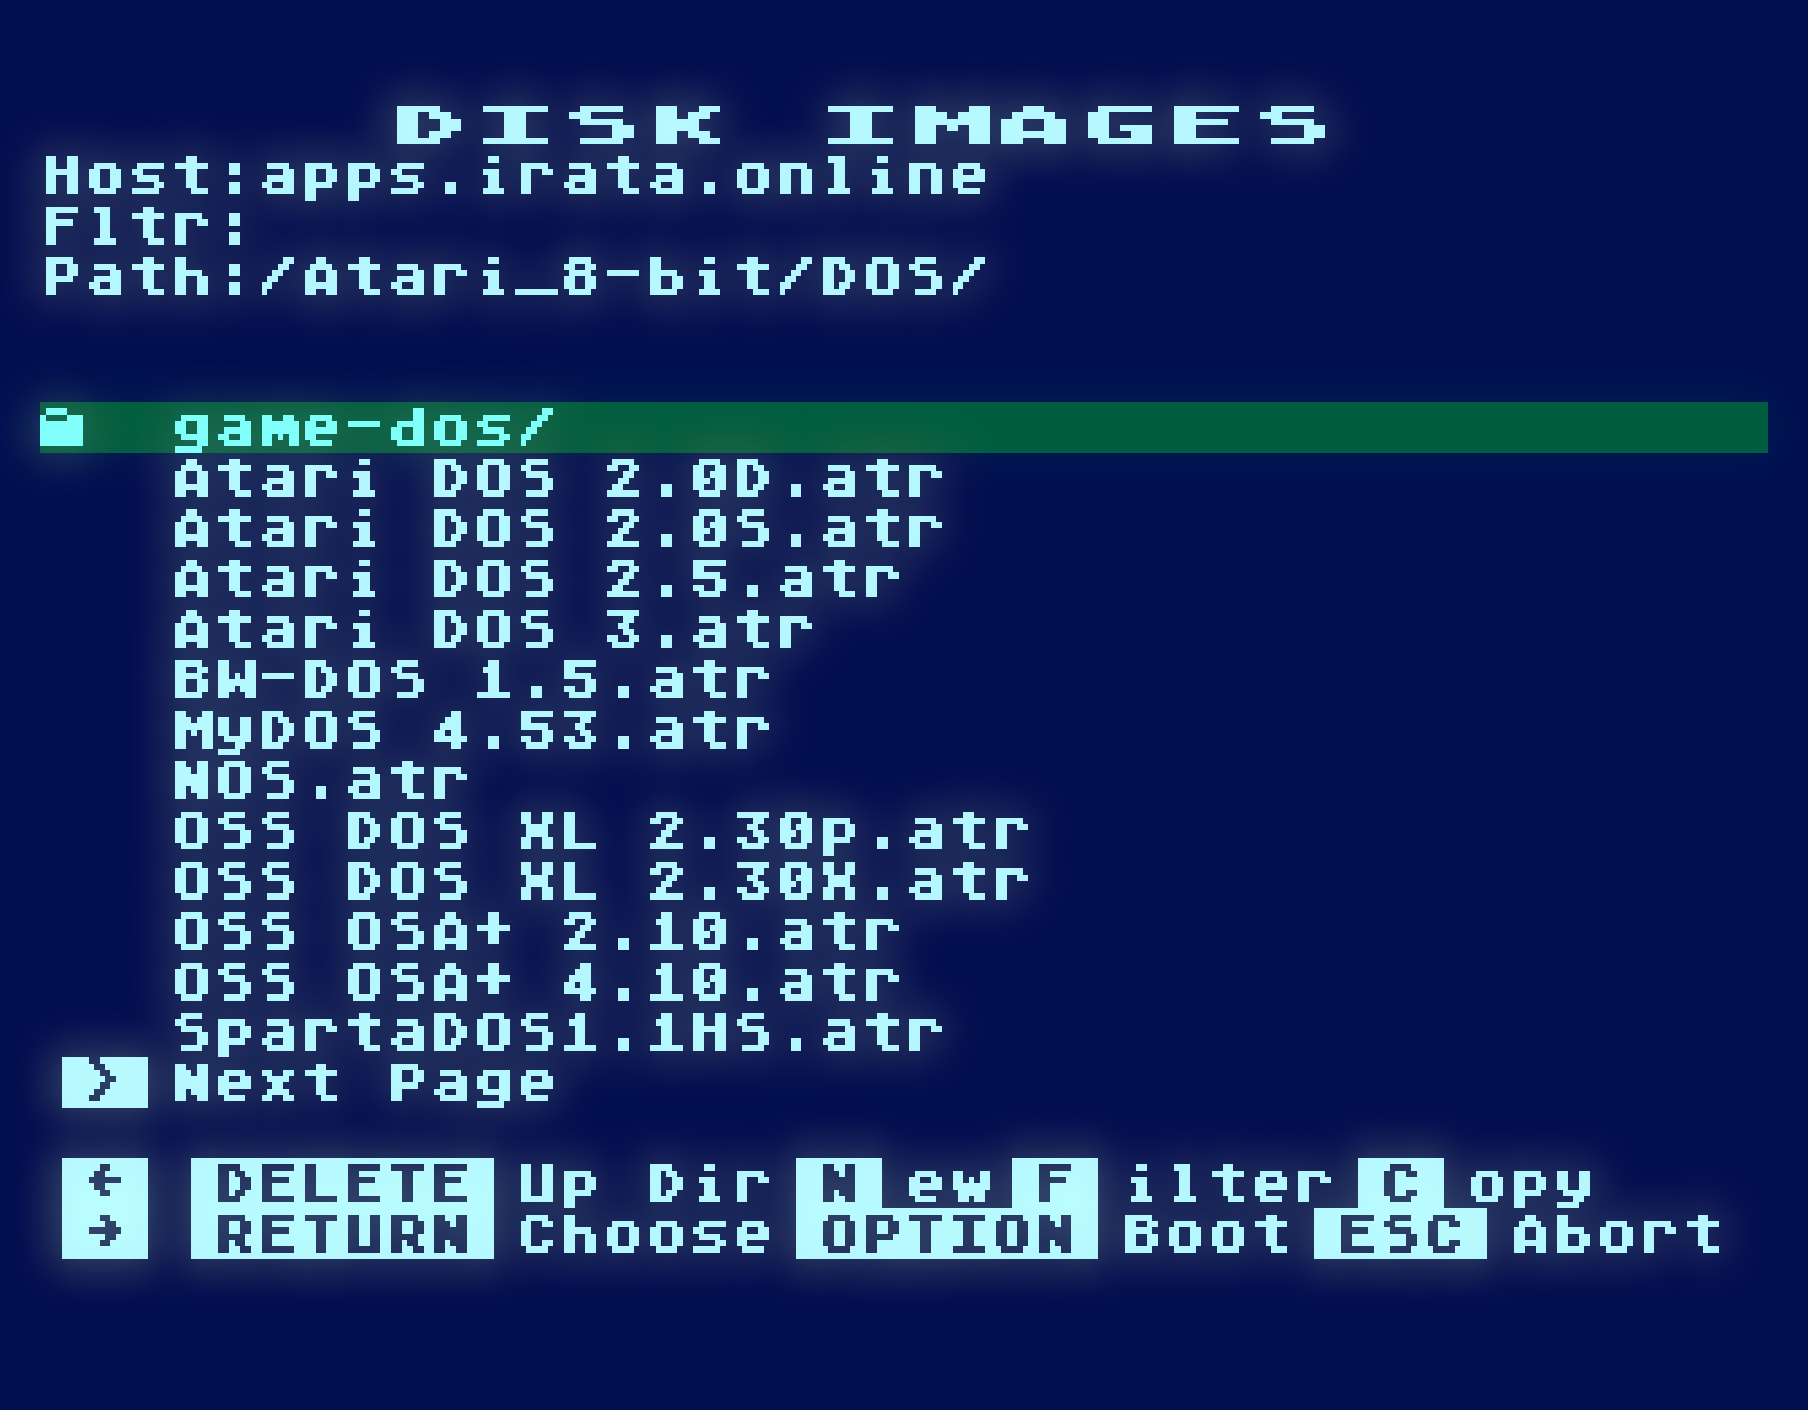
The tools themselves are not only present on the fnc-tools.atr disk on the apps.irata.online TNFS server, they are also present on each and every disk in the DOS folder on the same server. They are called the N tools, because they all begin with the letter ‘N‘:
NCD. Changes the directory pointed to by the selected N[x]: device. It’s useful so you don’t have to type the full path to a URL, each and every time you refer to an N[x]: device. So you can type N:FROG.EXE instead of N:FTP://ftp.pigwa.net/stuff/collections/holmes cd/Holmes 2/Atari Archives/Antic Files/88/FROG.EXE each time! In other words, this tool affects all of the other N tools, as well as the N: device.
NCOPY. Copies files. Takes a source, and a destination. Either source or destination can be a local device (D:, E:, P:, whatever.), or the network (N[x]:). It supports wildcards.
NDEL. Deletes a file from the network.
NDEV. Loads the N: handler into memory. Can be AUTORUN.
NDIR. Lists the directory of a network location. It asks the FujiNet for a long directory listing, which preserves case, spacing, and wraps the output every 31 characters. File size is shown approximated to bytes, kilobytes, or megabytes, as needed.
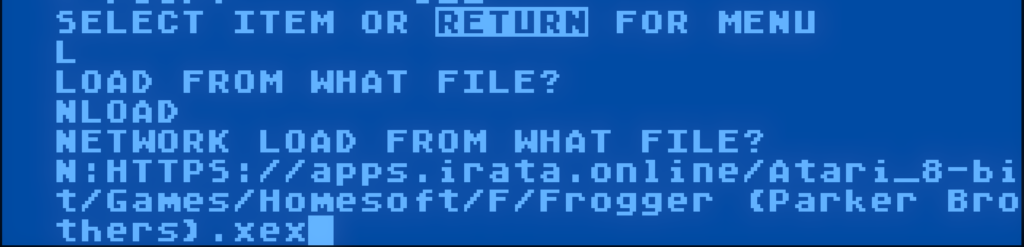
NLOAD. Loads and runs any standard ATARI binary load file, directly from any network endpoint.
NLOGIN. Sets login and password credentials for network protocols that need them, such as SMB.
NMKDIR. Tells a supported network protocol to create a new directory at the given path.
NPWD. Prints the current directory pointed to by the N[x]: device.
NREN. Renames an existing file, to a new name, separated by a comma. This is analogous to a move on some protocols.
NRMDIR. Removes a directory pointed to by the N[x]: device. Depending on the protocol, the directory may need to be empty beforehand.
NTRANS. Sets the translation mode for a given N[x]:, allowing you to convert text files to and from ATASCII into a compatible ASCII format, and back again. Setting a value of 0 turns off translation.
Relationship to NDEV.COM and the N: Handler
Both NDEV.COM and the N tools use the same network device on the FujiNet, in exactly the same way.
The N tools do not require NDEV.COM to be loaded, but the N tools help navigate network file systems, because the DOS you may be using may not know how to do so. NDEV.COM and the N tools work hand-in-hand to provide a transparent way to access network resources.
But the N: handler has some shortcomings:
ATARI DOS 2, and DOS 2.5’s Disk Utility Package (DUP.SYS) is loaded into a fixed location in memory, which happens to overwrite where NDEV.COM loads, obliterating the N: handler. In addition, MEM.SAV must be enabled if you want to go back and forth between the DUP and another program, so that the handler can be restored on exit from the DUP. The N tools provide a sensible alternative to access the same network resources even though the handler can’t be used.
MyDOS does not obliterate NDEV.COM in memory, so it can be used in its Disk Utility Package, so you can list directories and manipulate files using the usual commands. However, since the BINARY LOAD command has been moved to DOS.SYS, it is only accessible via the “D:” device, and calls it via CIO call #39, which NDEV.COM does not implement yet. The N tools provide NLOAD.COM, which can BINARY LOAD from the network.
SpartaDOS (disk and X) has the same BINARY LOAD issue as MyDOS. In addition, SpartaDOS X’s command processor thinks of N: as “DN:” instead of device N:. While there will be a SpartaDOS driver for FujiNet’s network device in the future, the N tools can be used to access the network device from the SpartaDOS X command processor. (Disk based SpartaDOS can actually use N: directly, with some quirks.)
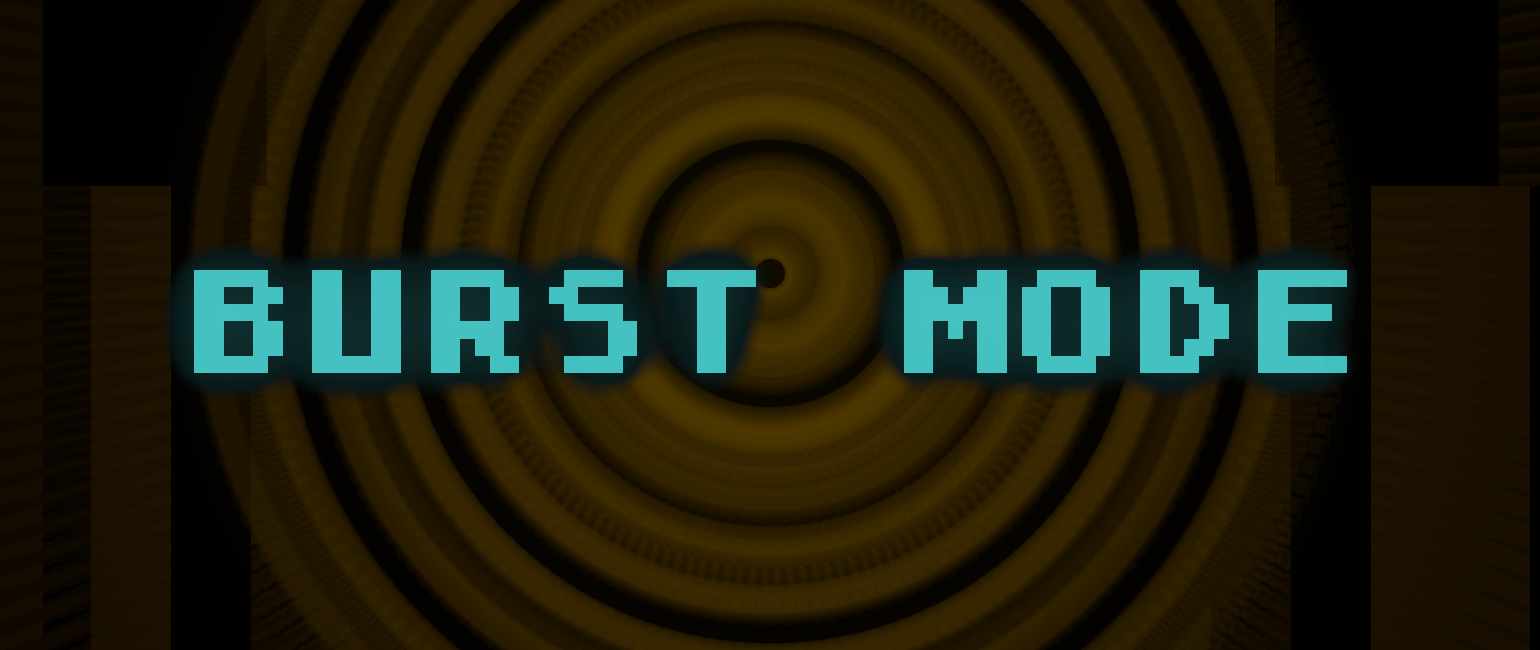
NDEV.COM does not yet implement burst mode (anyone want to help implement it?)
Demo Video
Here is a demo video showing why the N tools are important. Chapter Index below.
Demo video showing Why the N tools are important.
Chapter Index for Video
00:00 The DOS folder 01:10 What happens when you try to use N: in DOS 2.0 DUP? 04:40 DOS 2.0…What happens when you try to go back to BASIC without MEM.SAV? 05:20 Creating MEM.SAV so we can preserve the handler for BASIC and other applications. 07:45 The N tools 10:20 using NCOPY to copy from the network, to a floppy. 12:00 using NCOPY to copy from a floppy, to the network. 14:30 using NLOAD to load Cyclod on DOS 2. 15:30 Comparing to MYDOS 4.53 16:40 comparing Viewing directory via the N: device 16:58 comparing Copying via the N: device 17:55 Whoops! can’t load a binary file in MYDOS via the N: device. 19:08 Loading binary file with NLOAD. 19:55 Using N tools in SpartaDOS X
Hi guys, reaching out for anyone who may be able to help implement a feature missing from the N: handler, “burst mode”
Specifically, when more than 1 byte is requested by an IOCB, set up a read for that many bytes directly into the buffer specified by the IOCB.
The nice thing is, that an intermediate buffer will no longer be required (it’s only required for disk because of the fact that you must read at least a whole sector’s worth of data at a time), however on the N: device, you use DAUX1/DAUX2 in tandem with DBYT to specify how many bytes to read at a time, with DBUF pointing to a target buffer.
I did implement this in an early draft of the NDEV handler 5 years ago, but was unable to fully debug it.
The IBM PC FujiNet is being developed to use several physical interfaces. While initially we will be providing an RS-232-C version, we also want to do versions that work over parallel port, as well as ISA interfaces, including the sidecar ISA on the IBM PCjr. Because it’s not desirable that specific versions of FujiNet programs would need to be written or compiled for these specific interfaces, it was decided to implement a FujiNet BIOS interface that hooks into software interrupt (INT) F5.
This interface is loaded into memory via the FUJINET.SYS driver placed in CONFIG.SYS. This device driver not only provides the MS-DOS interface to FujiNet’s virtual disk drives giving each drive slot its own drive letter, it also provides the INT F5 service.
DEVICE=FUJINET.SYS FUJI_BPS=9600 FUJI_PORT=2
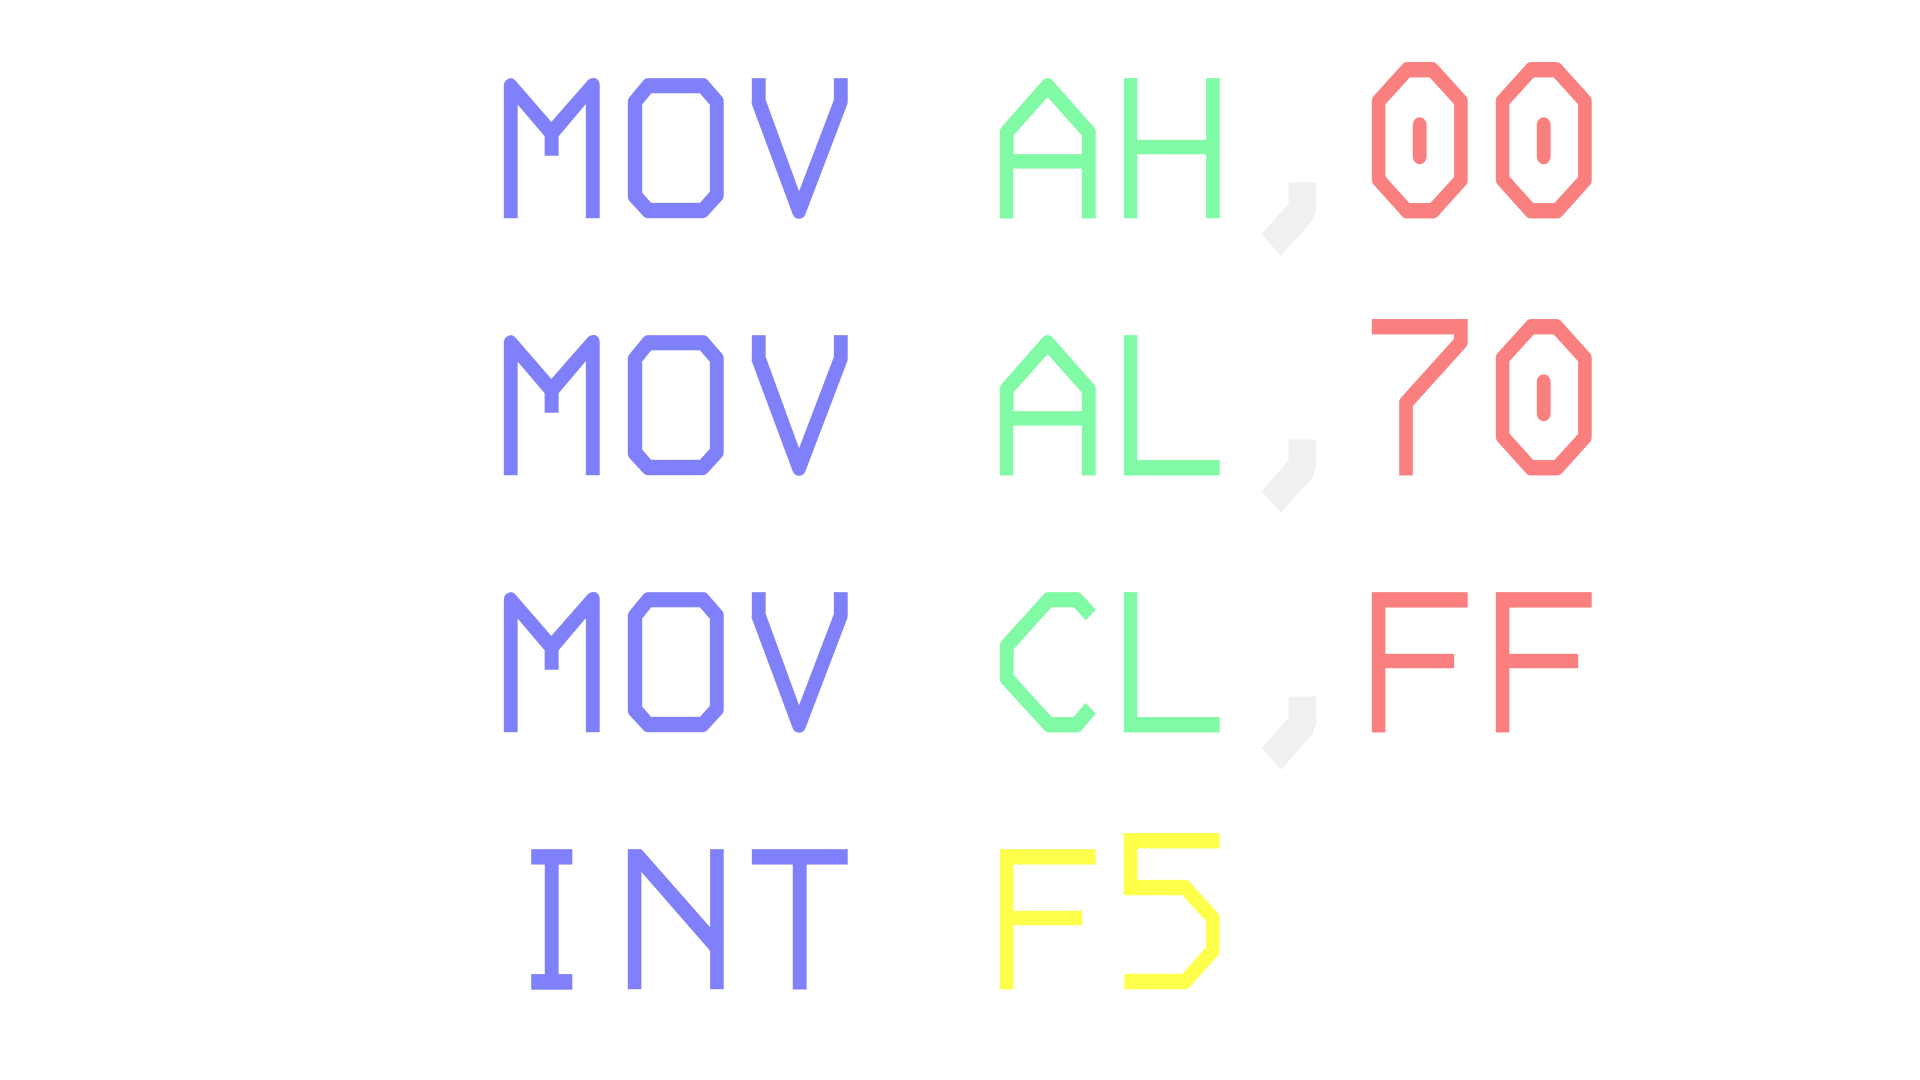
Once the driver is loaded, commands can be sent to the FujiNet via the INT F5 trap, such as this snippet of assembler to send a RESET to the FujiNet:
MOV AH,00                ; Command type: No Payload
MOV AL,70                ; send to FUJI sub-device
MOV CL,FF                ; Send Reset command ($FF)
INT F5                   ; Do it. Return value is 'C' in AL
MOV AH,4C                ; Select Return to DOS command
INT 21                   ; Execute DOS service, Exit.
More information can be found about this programming interface, in our wiki:
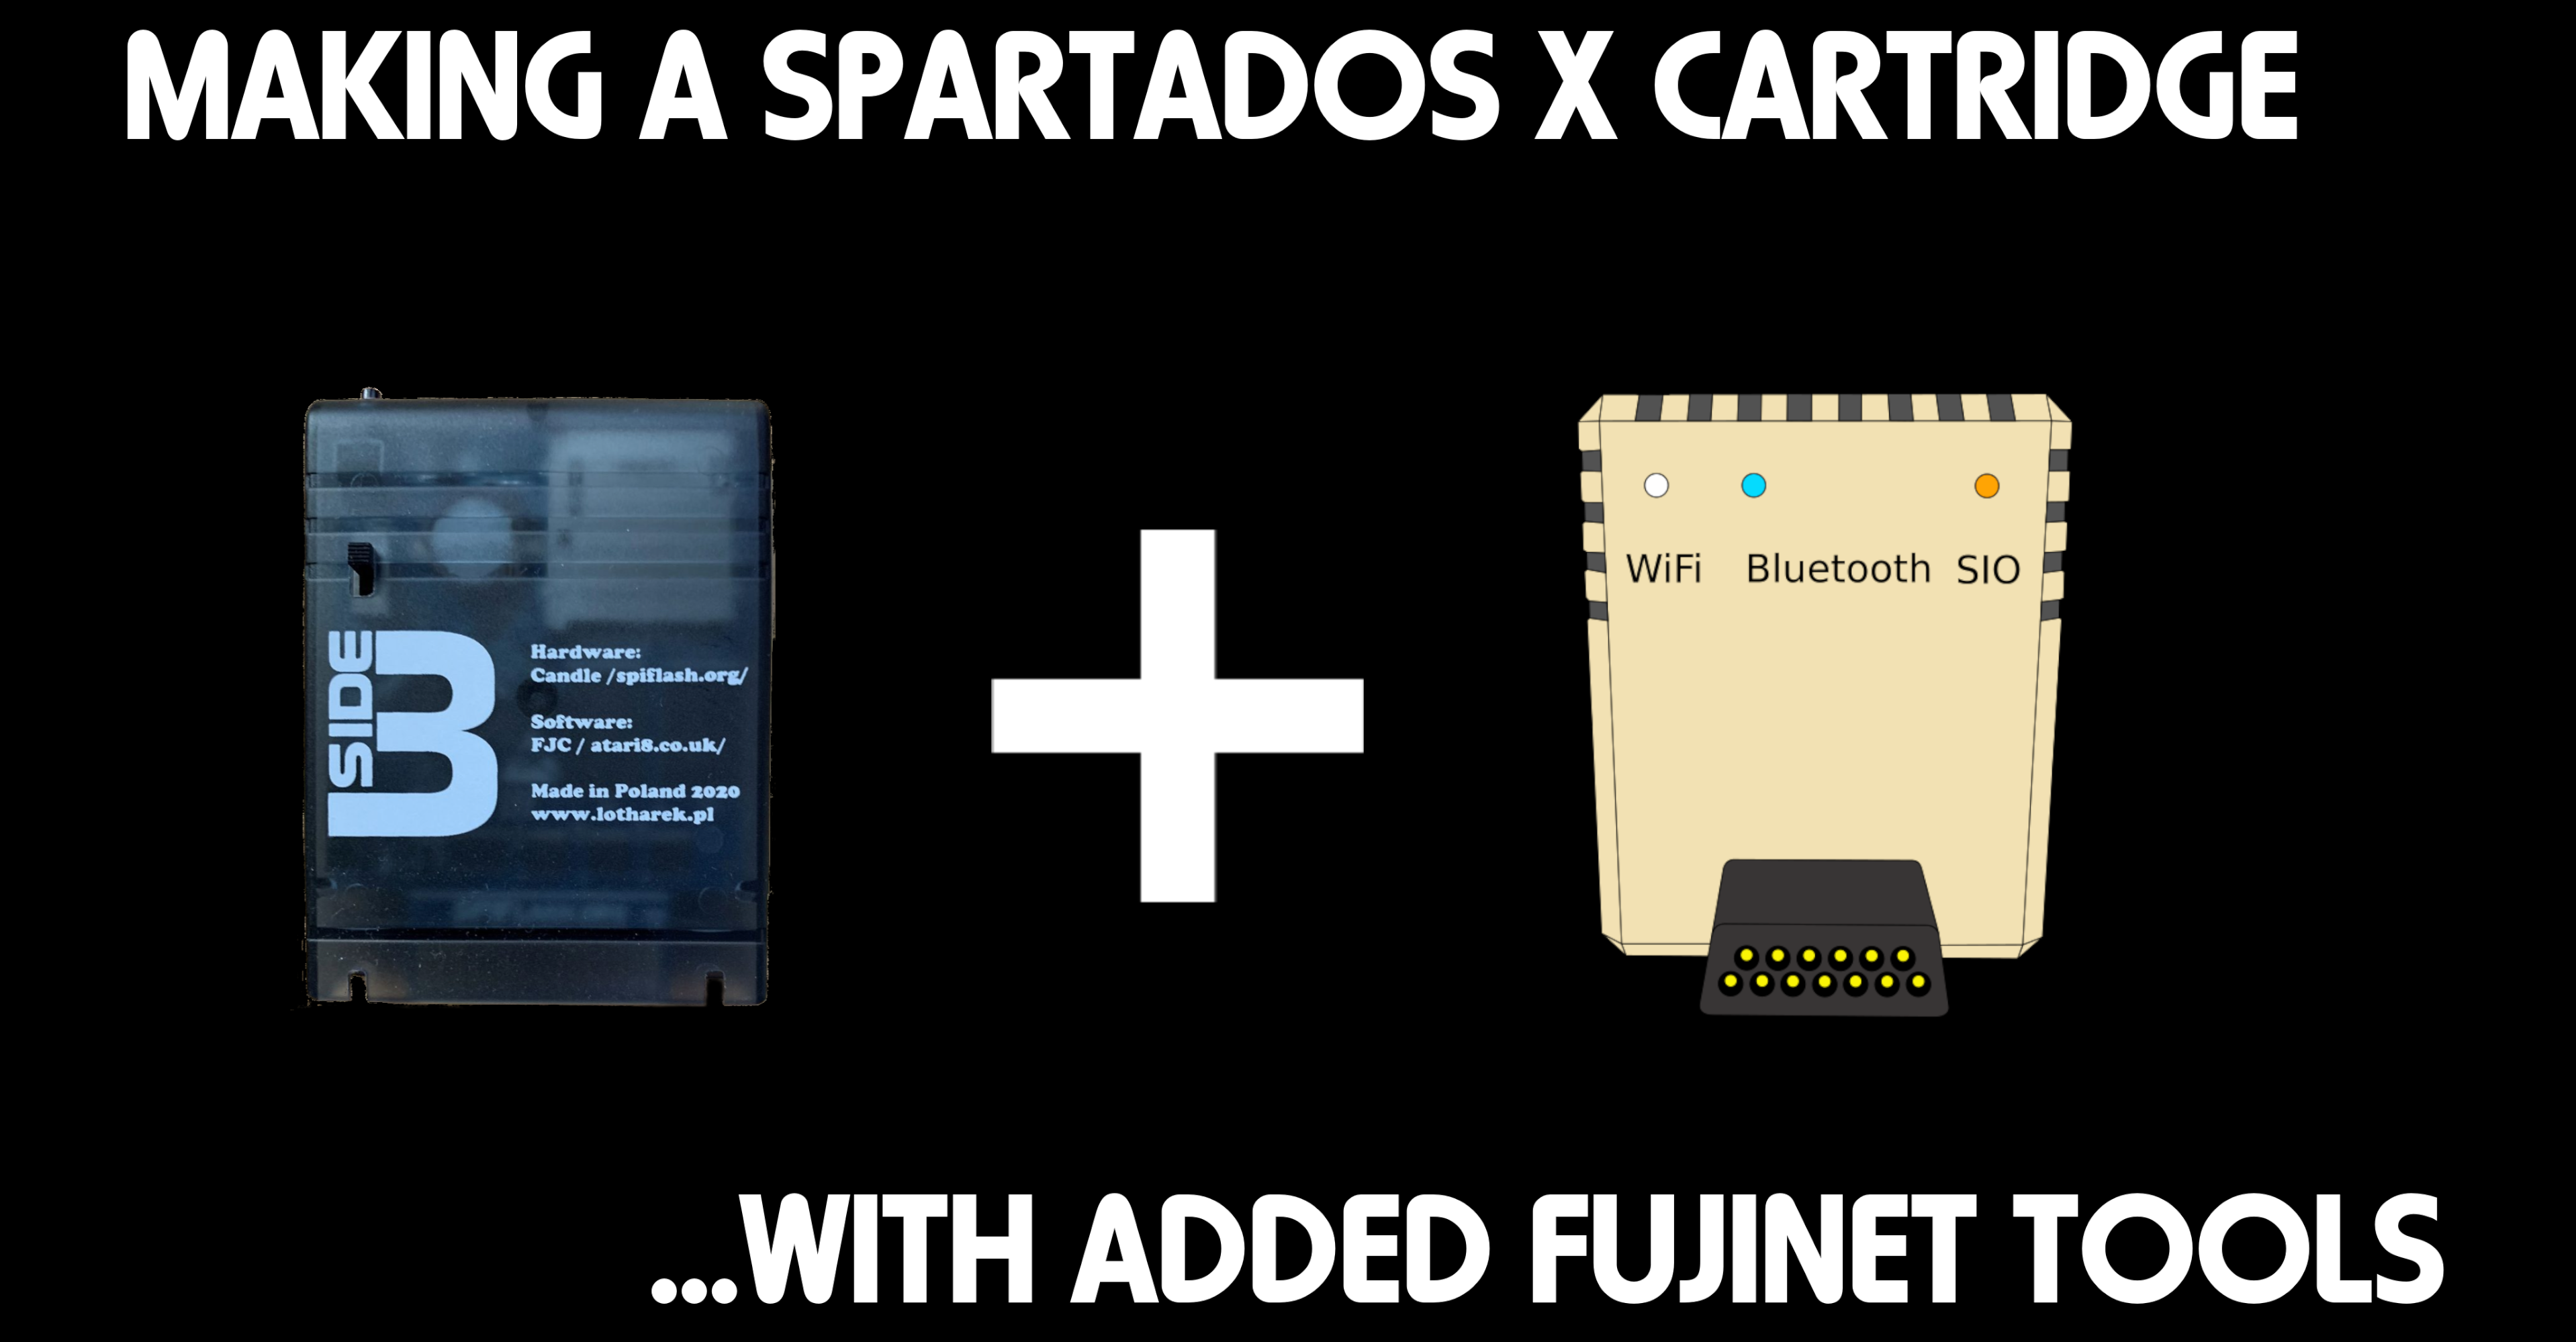
The following YouTube video shows how to create your own SpartaDOS X cartridge with the FujiNet tools, from scratch, using the SpartaDOS X Imager (SDXImager) tool.
For this video, I installed a fresh copy of Ubuntu Linux Desktop using default options, and added the following packages via a terminal:
sudo apt install build-essential git wine
Once everything is built, you can transfer it to the nearest FujiNet via WebDAV, by selecting Network in Files, and Connecting to the address of your FujiNet:
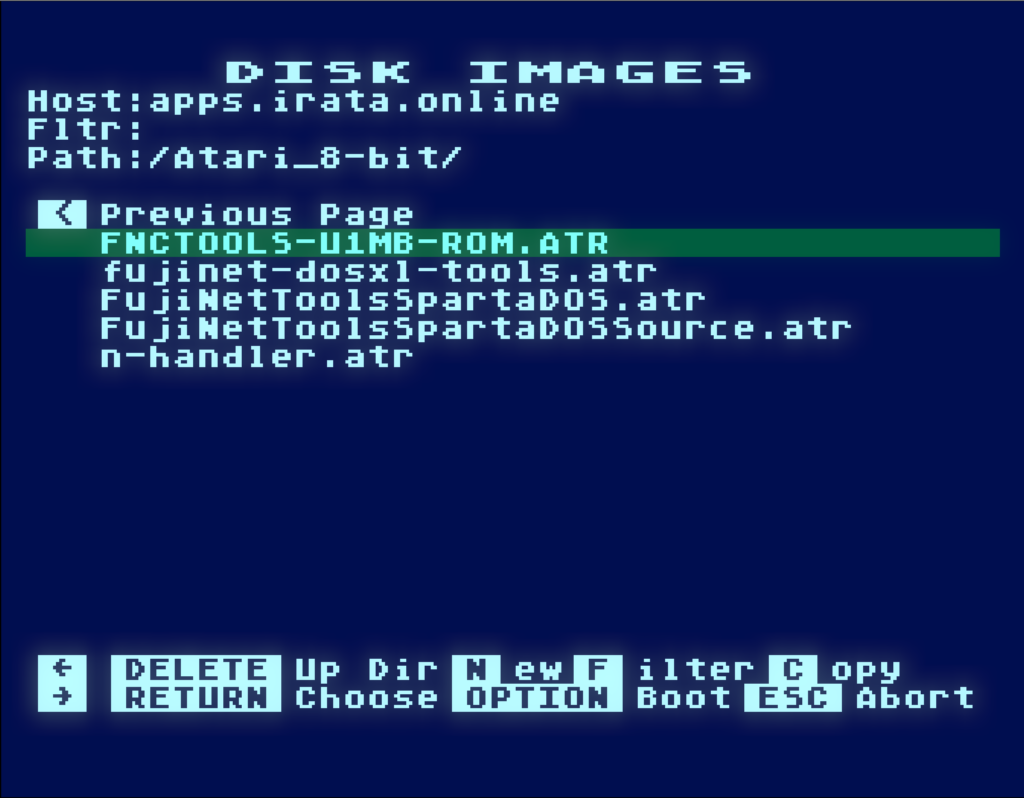
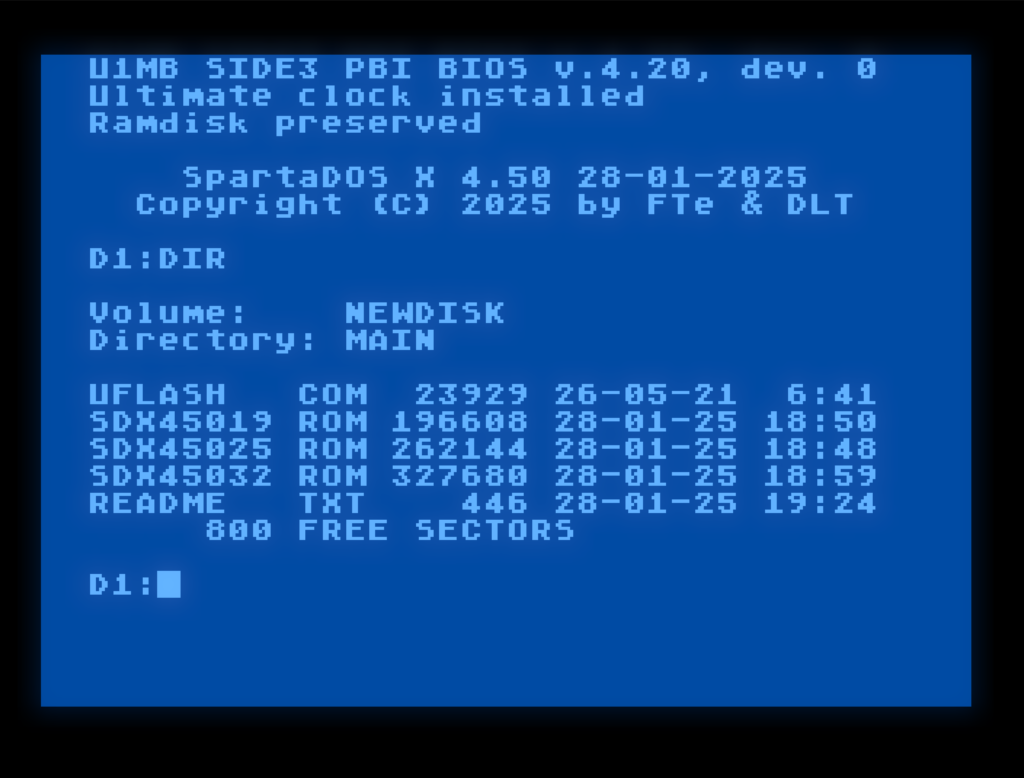
The FNCTOOLS-U1MB-ROM.ATR disk image on apps.irata.online, which provides a ROM of SpartaDOS X for Ultimate 1MB users, that includes the FujiNet tools, has been updated to SpartaDOS 4.50, and is available on the apps.irata.online server. The UFLASH tool is also provided on the disk.
Three versions of the ROM are provided:
192K, which contains most of the tools.
256K, which contains all of the tools.
320K, which contains all of the tools, as well as their corresponding MAN pages.
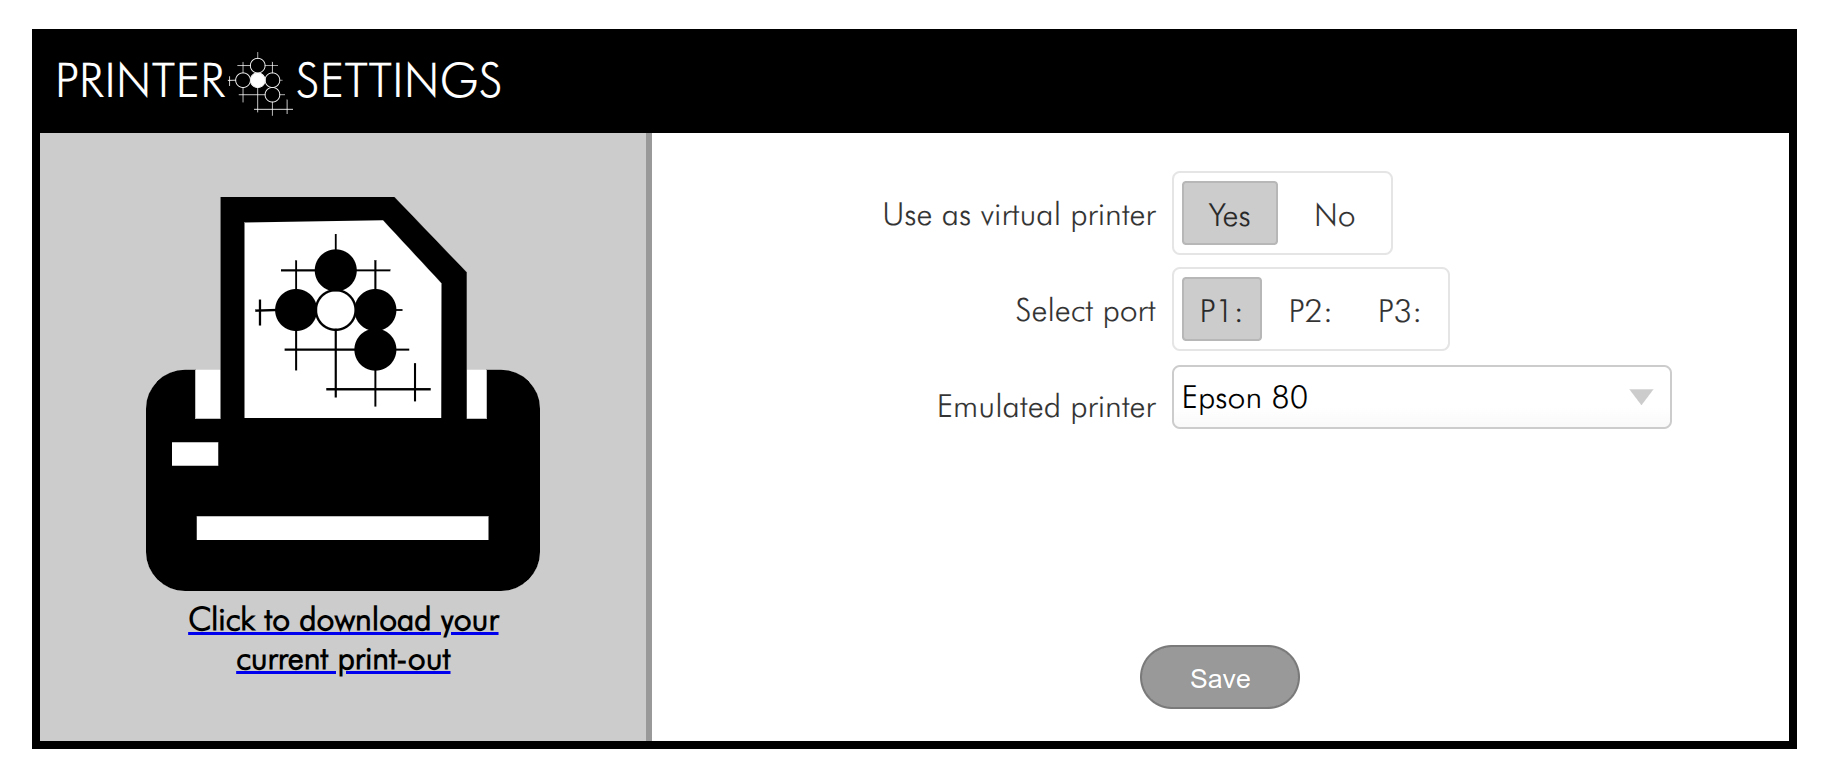
FujiNet has a virtual printer that is exposed to the host computer. This printer simulates a variety of vintage printers, accepting the commands specific to the desired printer and rendering the result as a PDF file that you can download from the web interface and print on a modern printer.
The following example PDFs were printed from various applications, showing the type of output you can expect from FujiNet’s virtual printer. For each of these emulations, Jeff Piepmeier emulated not only the behavior of the printer, but also painstakingly recreated the character set and rendering characteristics of each printer.
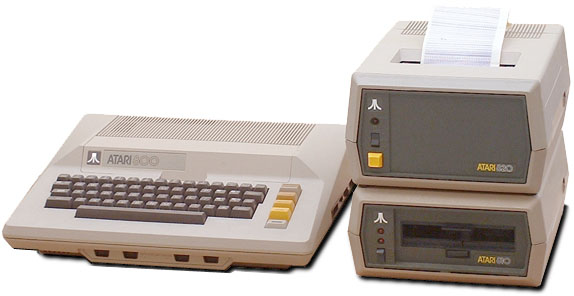
ATARI 820
The Atari 820 was the first announced printer for the 400 and 800 series computers in 1979. It was based on an Eaton 7000 printer mechanism used in field logging printers, and its carriage had a 40 character width. It was very unusual in that it could also print on the horizontal axis of the paper, which limited its potential width to 28 characters. It was also designed to be the same width as the Atari 810 and 815 disk drives, allowing it to be stacked on top.
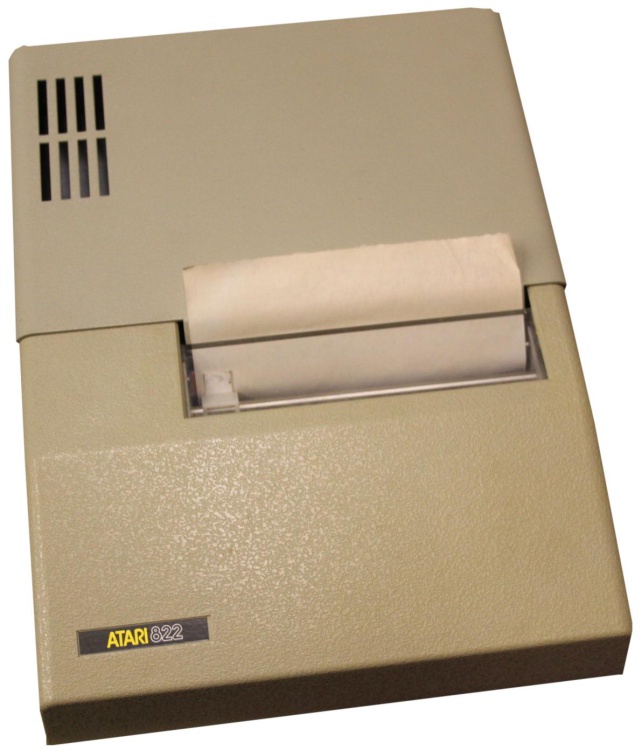
The ATARI 822 was a silent thermal printer that ATARI licensed from Trendcom, a variation of their model 100. It too had a carriage that could print 40 columns across. It required specially treated thermal paper to operate, which you can still purchase, as the type and size of paper are still used in some fax machines today.
The 80 column variant of this unit, the Trendcom 200 was used as the mechanism for the Apple Silentype printer.
These printers could not only print text, but they also could emit bitmapped graphics. The Atari 822 has a horizontal line resolution of 480 pixels.
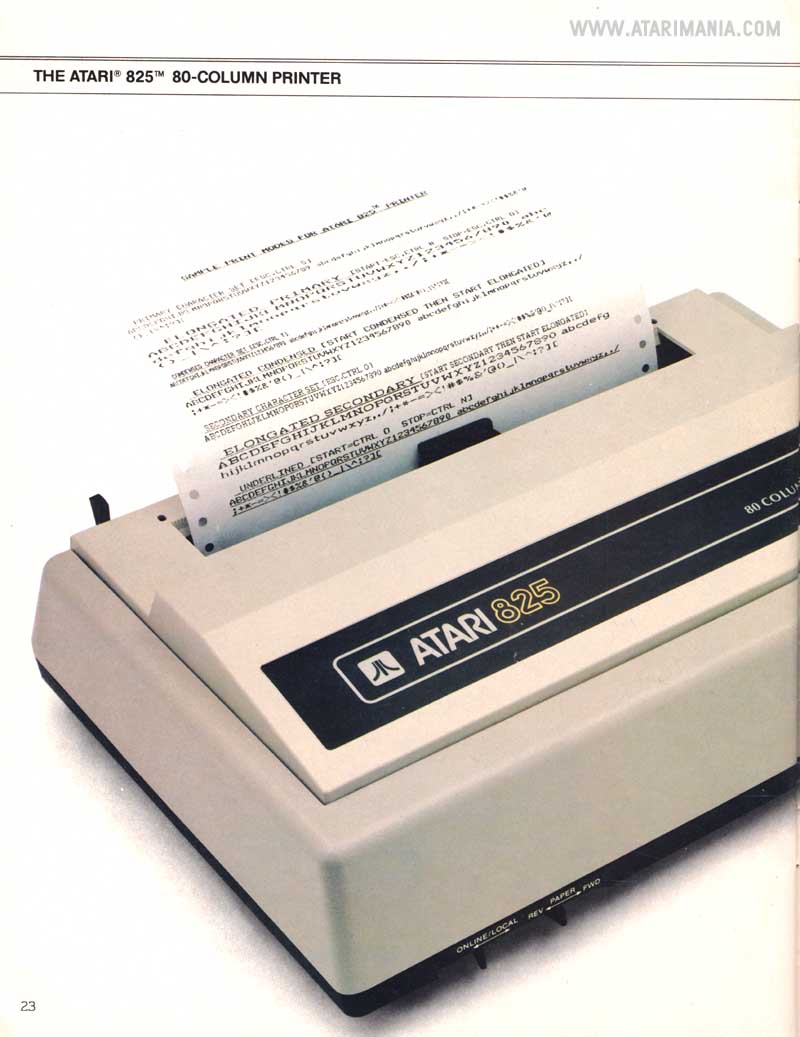
For the 825, ATARI licensed the Centronics 737 as their high-end printer for the 400 and 800 series computers. It had a carriage capable of printing 80 column text, and had advanced features such as multiple fonts, and the ability to handle vertical tabs, which moved the printer page upward and allowed for multi column printing. Its 80 column width also made it usable for printing program listings. (picture courtesy of AtariMania.com)
All of the dot-matrix printers shown here worked with either friction fed roll paper, or with tractor-fed paper. The FujiNet will seperate each page on the PDF, so that it can be printed on modern printers.
Because Centronics did not license the bare mechanism to ATARI, and insisted that it be sold as is, the 825 required the use of the Atari 850 interface module’s parallel port. The FujiNet implementation has no such requirement.
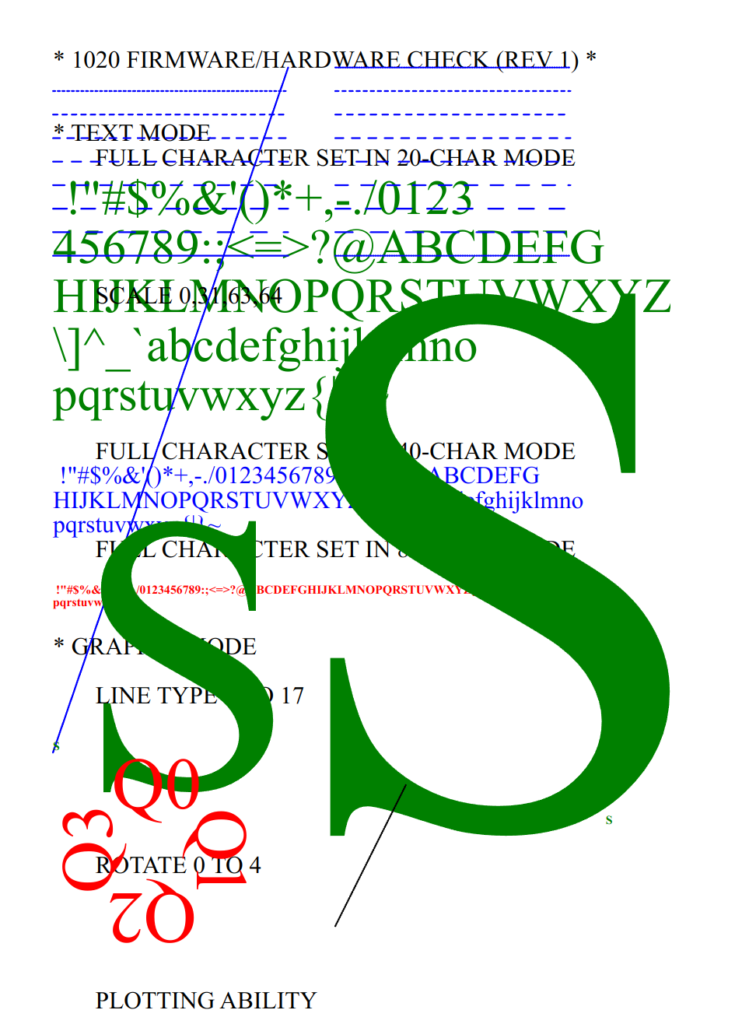
The Atari 1020 was a very small pen plotter licensed from Alps Microelectronics. Its pen holder could select between four colored pens, and the firmware on the printer could accept both text (which it would render caligraphically, and the graphics commands to move the pen across the paper to draw lines and shapes.
The 1020 emulation is unique in that it renders directly to SVG.
ATARI 1025
For the 1025, Atari licensed the Oki Microline 80. It was intended to replace the ATARI 825 printer in the line-up as the 80 column dot matrix printer option, and also had a connection for an automatic sheet feeder, which ATARI never licensed. Like the 825, the 1025 had multiple fonts for different character widths, but lacked the proportional font that was present on the 825. It did, however, have support for the European character set additions that were present on the ATARI XL and XE systems.
The Mannesmann-Tally Riteman LQ was used as the basis for the ATARI 1027, a letter quality printer that accepted single sheets of paper. Because the rubber in this printer mechanism is guaranteed to decompose over time, the FujiNet is now one of the only ways to experience how this printer actually functioned.
The typeface used by this printer is Prestige Elite 12.
The ATARI 1029 was a printer which saw limited release, mostly in Europe, at the end of the XL series line. It was licensed from Seikosha, and the same mechanism was licensed to other companies such as Commodore. It too is an 80 column printer, with international character set support.
With the XE series, ATARI opted to license printer mechanisms from Citizen. This 80 column printer matches the XE series in industrial design, and is compatible with the Epson MX-80 control codes, and can also do graphics.
To complement the XMM801 dot-matrix printer, ATARI released the XDM121 daisy-wheel printer, again using a printer mechanism licensed from Citizen. The typeface used here in this simulation is Pica 10.
The EPSON MX-80 was an inexpensive; ubiquitous 80-column printer that was available for any microcomputer with a suitable parallel port. The MX-80 was also available with a graphics printing option called GrafTrax, which is also present in FujiNet’s emulation, allowing programs like Print Shop to print as-is. Traditionally, ATARI users needed a parallel port interface such as the Atari 850, P:R: Connection, or MPP-1150 to provide the necessary connection; this is not needed for FujiNet. The extended commands brought by the EPSON FX-80 are also supported.
Because the MX-80 emulation in FujiNet supports GrafTrax, it will work with programs that print graphics, such as Print Shop.
The OKIMATE 10 was a novel color thermal wax printer produced by Okidata starting in 1984. It was also unique in that the printer had interface modules for Atari, Commodore, Apple ][, and IBM PC systems that plugged into the printer, and exposed the appropriate port.
Note: There seems to have been a regression that crept into the color output mode.
The HTML Printer outputs an HTML document for anything fed to it.
HTML ATASCII Printer
The ATASCII printer is a variant of the HTML printer that can emit the entire ATASCII character set, by using a specific ATASCII font embedded into the document. This can be useful for emitting listings that need to preserve their special characters, such as BASIC listings.
Other Platforms
Other platforms can choose to provide these printers to their host systems. For example, the COLECO ADAM version of FujiNet provides a complete emulation of the SmartWriter printer, complete with bi-directional printing support, needed in programs such as SmartWriter and AdamCalc.
Platforms such as Apple ][ need to find a way to interface the virtual printer in the firmware to the outside world. If you’d like to help, please engage us on the Discord.
Special Thanks
A special thanks to Jeff Piepmeier, who implemented the majority of the printer emulations and designed their fonts. Without his work, none of this would exist.
Also a special thanks to Oscar Fowler, who implemented the HTML printers.